Publish via WebRTC/WHIP
You can publish a media source to OvenMediaEngine Enterprise on AWS via WebRTC/WHIP Protocol from a WebRTC-capable live encoder or a web browser, with no additional plug-ins required.
In addition, by leveraging WebRTC Simulcast, you can send multiple quality layers within a single publishing session. This helps deliver more stable sub-second live streaming by adapting to each viewer’s network conditions, and it can also reduce transcoding load depending on your workflow.
This guide walks you through how to publish a stream via WebRTC/WHIP and how to perform basic playback and status checks after publishing.
| Item | Supported |
|---|---|
| Container | RTP / RTCP |
| Security | DTLS, SRTP |
| Transport | ICE |
| Error Correction | ULPFEC (VP8, H.264), In-band FEC (Opus) |
| Codec | VP8, H.264, H.265, Opus |
| Signaling | Self-Defined Signaling Protocol, Embedded WebSocket-based Server / WHIP |
Start Publishing a WebRTC/WHIP Stream
In this example, we use OBS Studio (Option A), one of the most commonly used live encoder software, and the OvenPlayer Demo provided by OvenMedia Labs (Option B).
[Option A] Publish from a Live Encoder (OBS Studio)
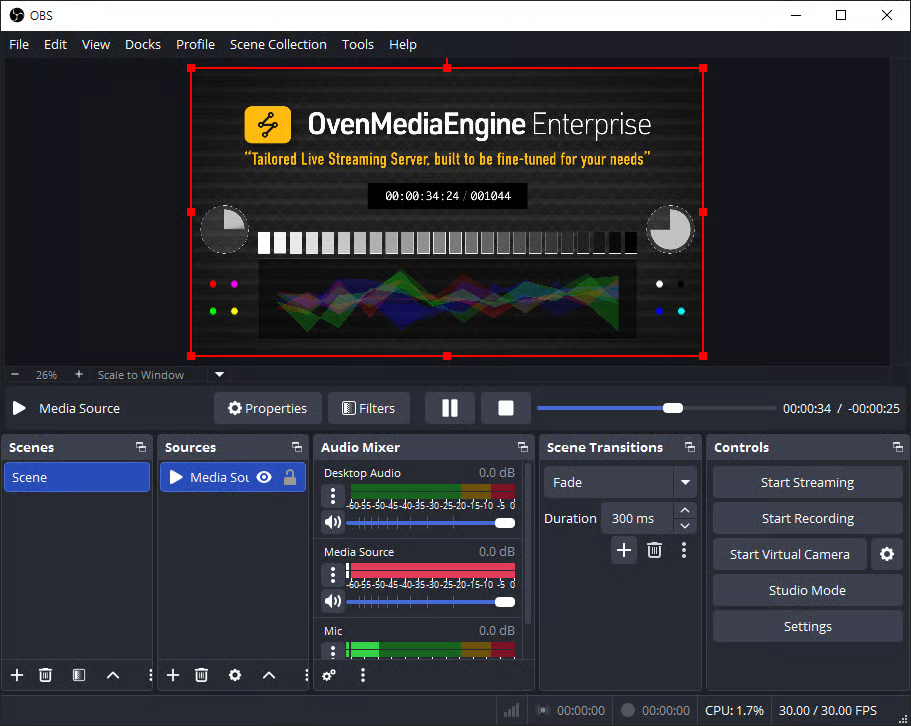
- Launch Open Broadcaster Software (OBS) Studio.
- If OBS Studio is not installed, download it from the official page (https://obsproject.com/download).
- Add a media source you want to publish (e.g., Media Source, Camera. or Screen Capture).
- Click [Settings] in the bottom-right corner of OBS.
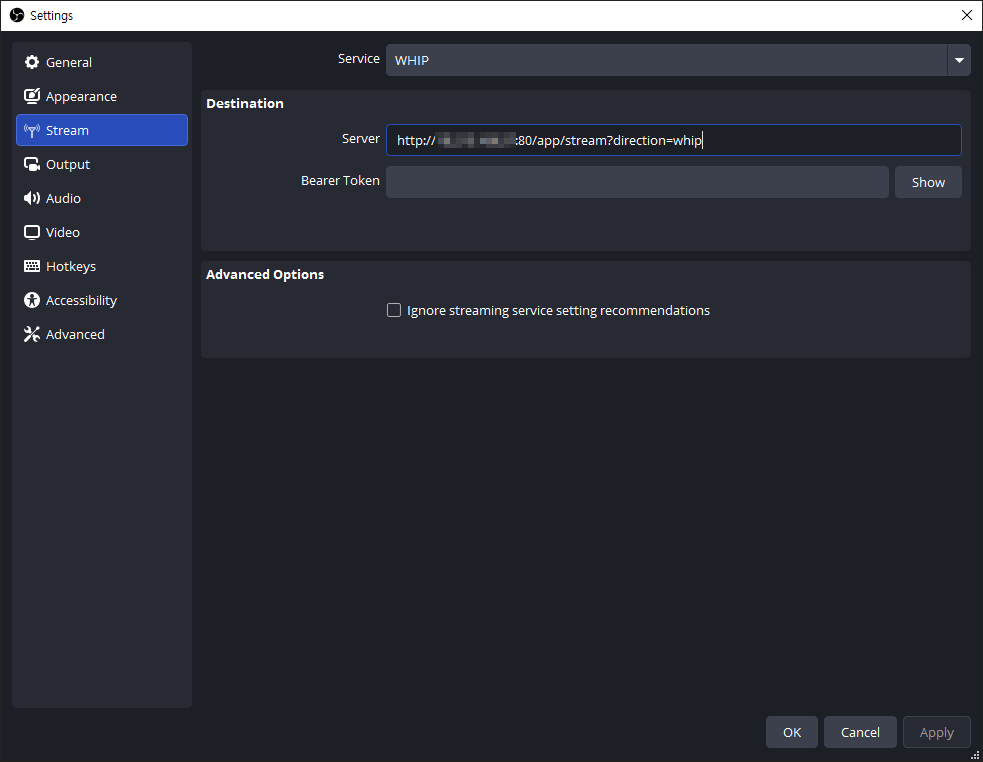
- In the left menu of Settings, select the [Stream] tab.
- Under [Service], select [WHIP], then enter one of the WebRTC/WHIP Ingress URL patterns below in the Server field.
- Non-TLS:
- WebRTC Input URL Format:
ws://{Public IPv4 or Domain}:80/{app}/{stream}?direction=send - WHIP URL Format:
http://{Public IPv4 or Domain}:80/{app}/{stream}?direction=whip
- WebRTC Input URL Format:
- TLS:
- WebRTC (TLS) Input URL Format:
wss://{Public IPv4 or Domain}:443/{app}/{stream}?direction=send - WHIP (TLS) URL Format:
https://{Public IPv4 or Domain}:443/{app}/{stream}?direction=whip
- WebRTC (TLS) Input URL Format:
- Non-TLS:
If you are not sure about the WebRTC Input or WHIP URL pattern, create a [Managed Stream] in the Web Console and check it under the [URLs] tab.
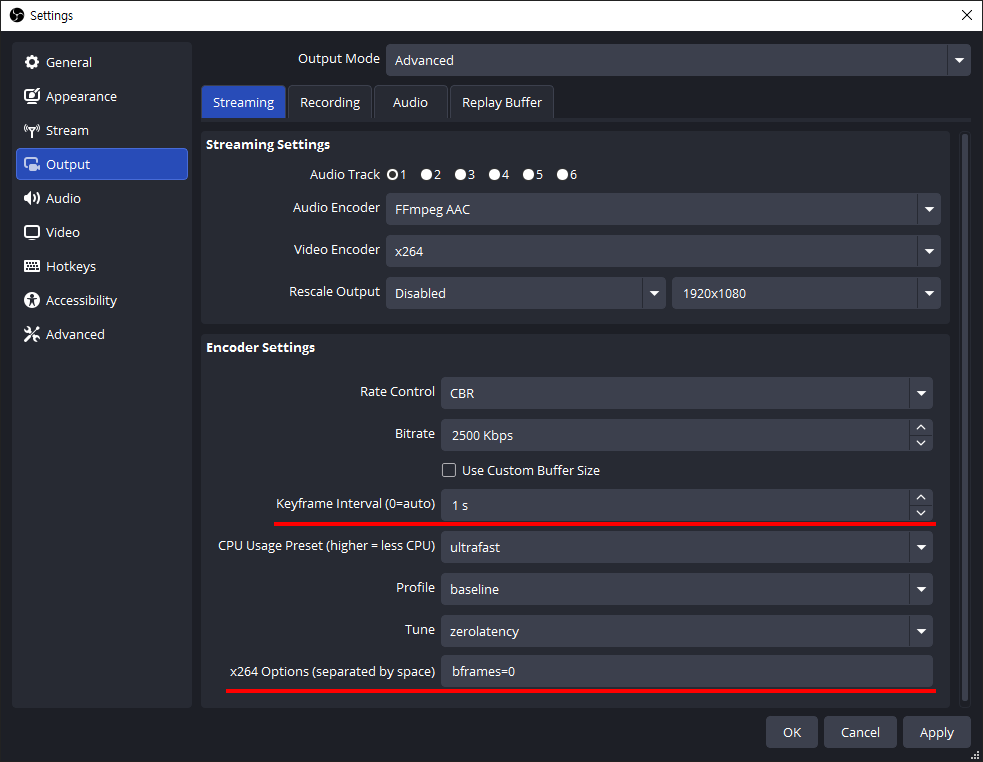
- Next, in the [Output] tab, we recommend setting the
Keyframe Intervalto 1-second andB-framesto 0 for smooth sub-second latency and low-latency streaming.
Setting B-frames to 0 (bframes=0) helps reduce playback stuttering in WebRTC output. The example above shows the configuration when using the x264 encoder. Depending on the selected encoder, available options and layout may vary. When using WebRTC as the output, setting B-frames to 0 is recommended.
- If needed, adjust additional settings in tabs such as [Audio] and [Video], then click [OK] to return to the OBS main screen.
- Finally, click [Start Streaming] to begin publishing.
[Option B] Publish using the OvenPlayer Demo
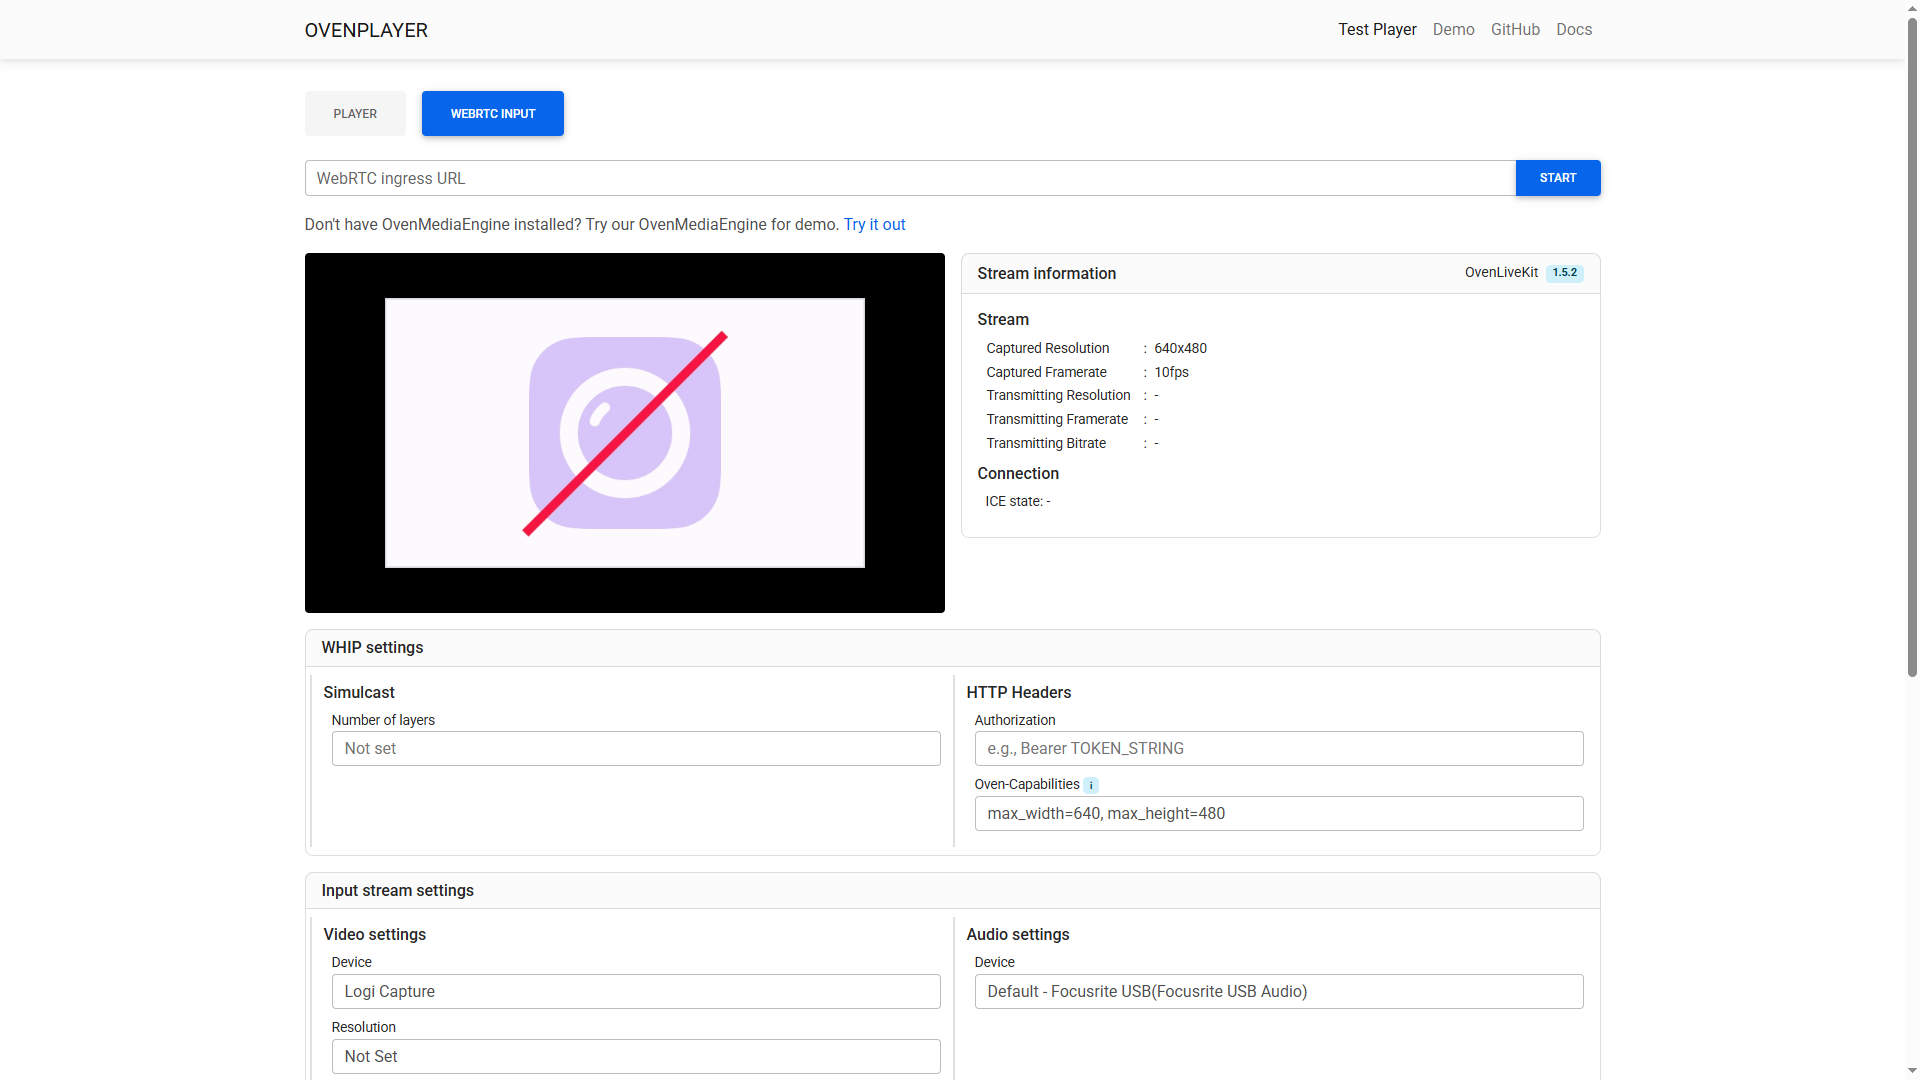
- For Non-TLS, open: http://demo.ovenplayer.com/demo_input.html or For TLS, open: https://demo.ovenplayer.com/demo_input.html.
- In the [WebRTC Ingress URL] field, enter one of the WebRTC/WHIP Ingress URL patterns below, depending on whether you use Non-TLS or TLS.
- Non-TLS:
- WebRTC Input URL Format:
ws://{Public IPv4 or Domain}:80/{app}/{stream}?direction=send - WHIP URL Format:
http://{Public IPv4 or Domain}:80/{app}/{stream}?direction=whip
- WebRTC Input URL Format:
- TLS:
- WebRTC (TLS) Input URL Format:
wss://{Public IPv4 or Domain}:443/{app}/{stream}?direction=send - WHIP (TLS) URL Format:
https://{Public IPv4 or Domain}:443/{app}/{stream}?direction=whip
- WebRTC (TLS) Input URL Format:
- Non-TLS:
- Click [START] on the right to verify that publishing is working properly.
If you are not sure about the WebRTC Input or WHIP URL pattern, create a [Managed Stream] in the Web Console and check it under the [URLs] tab.
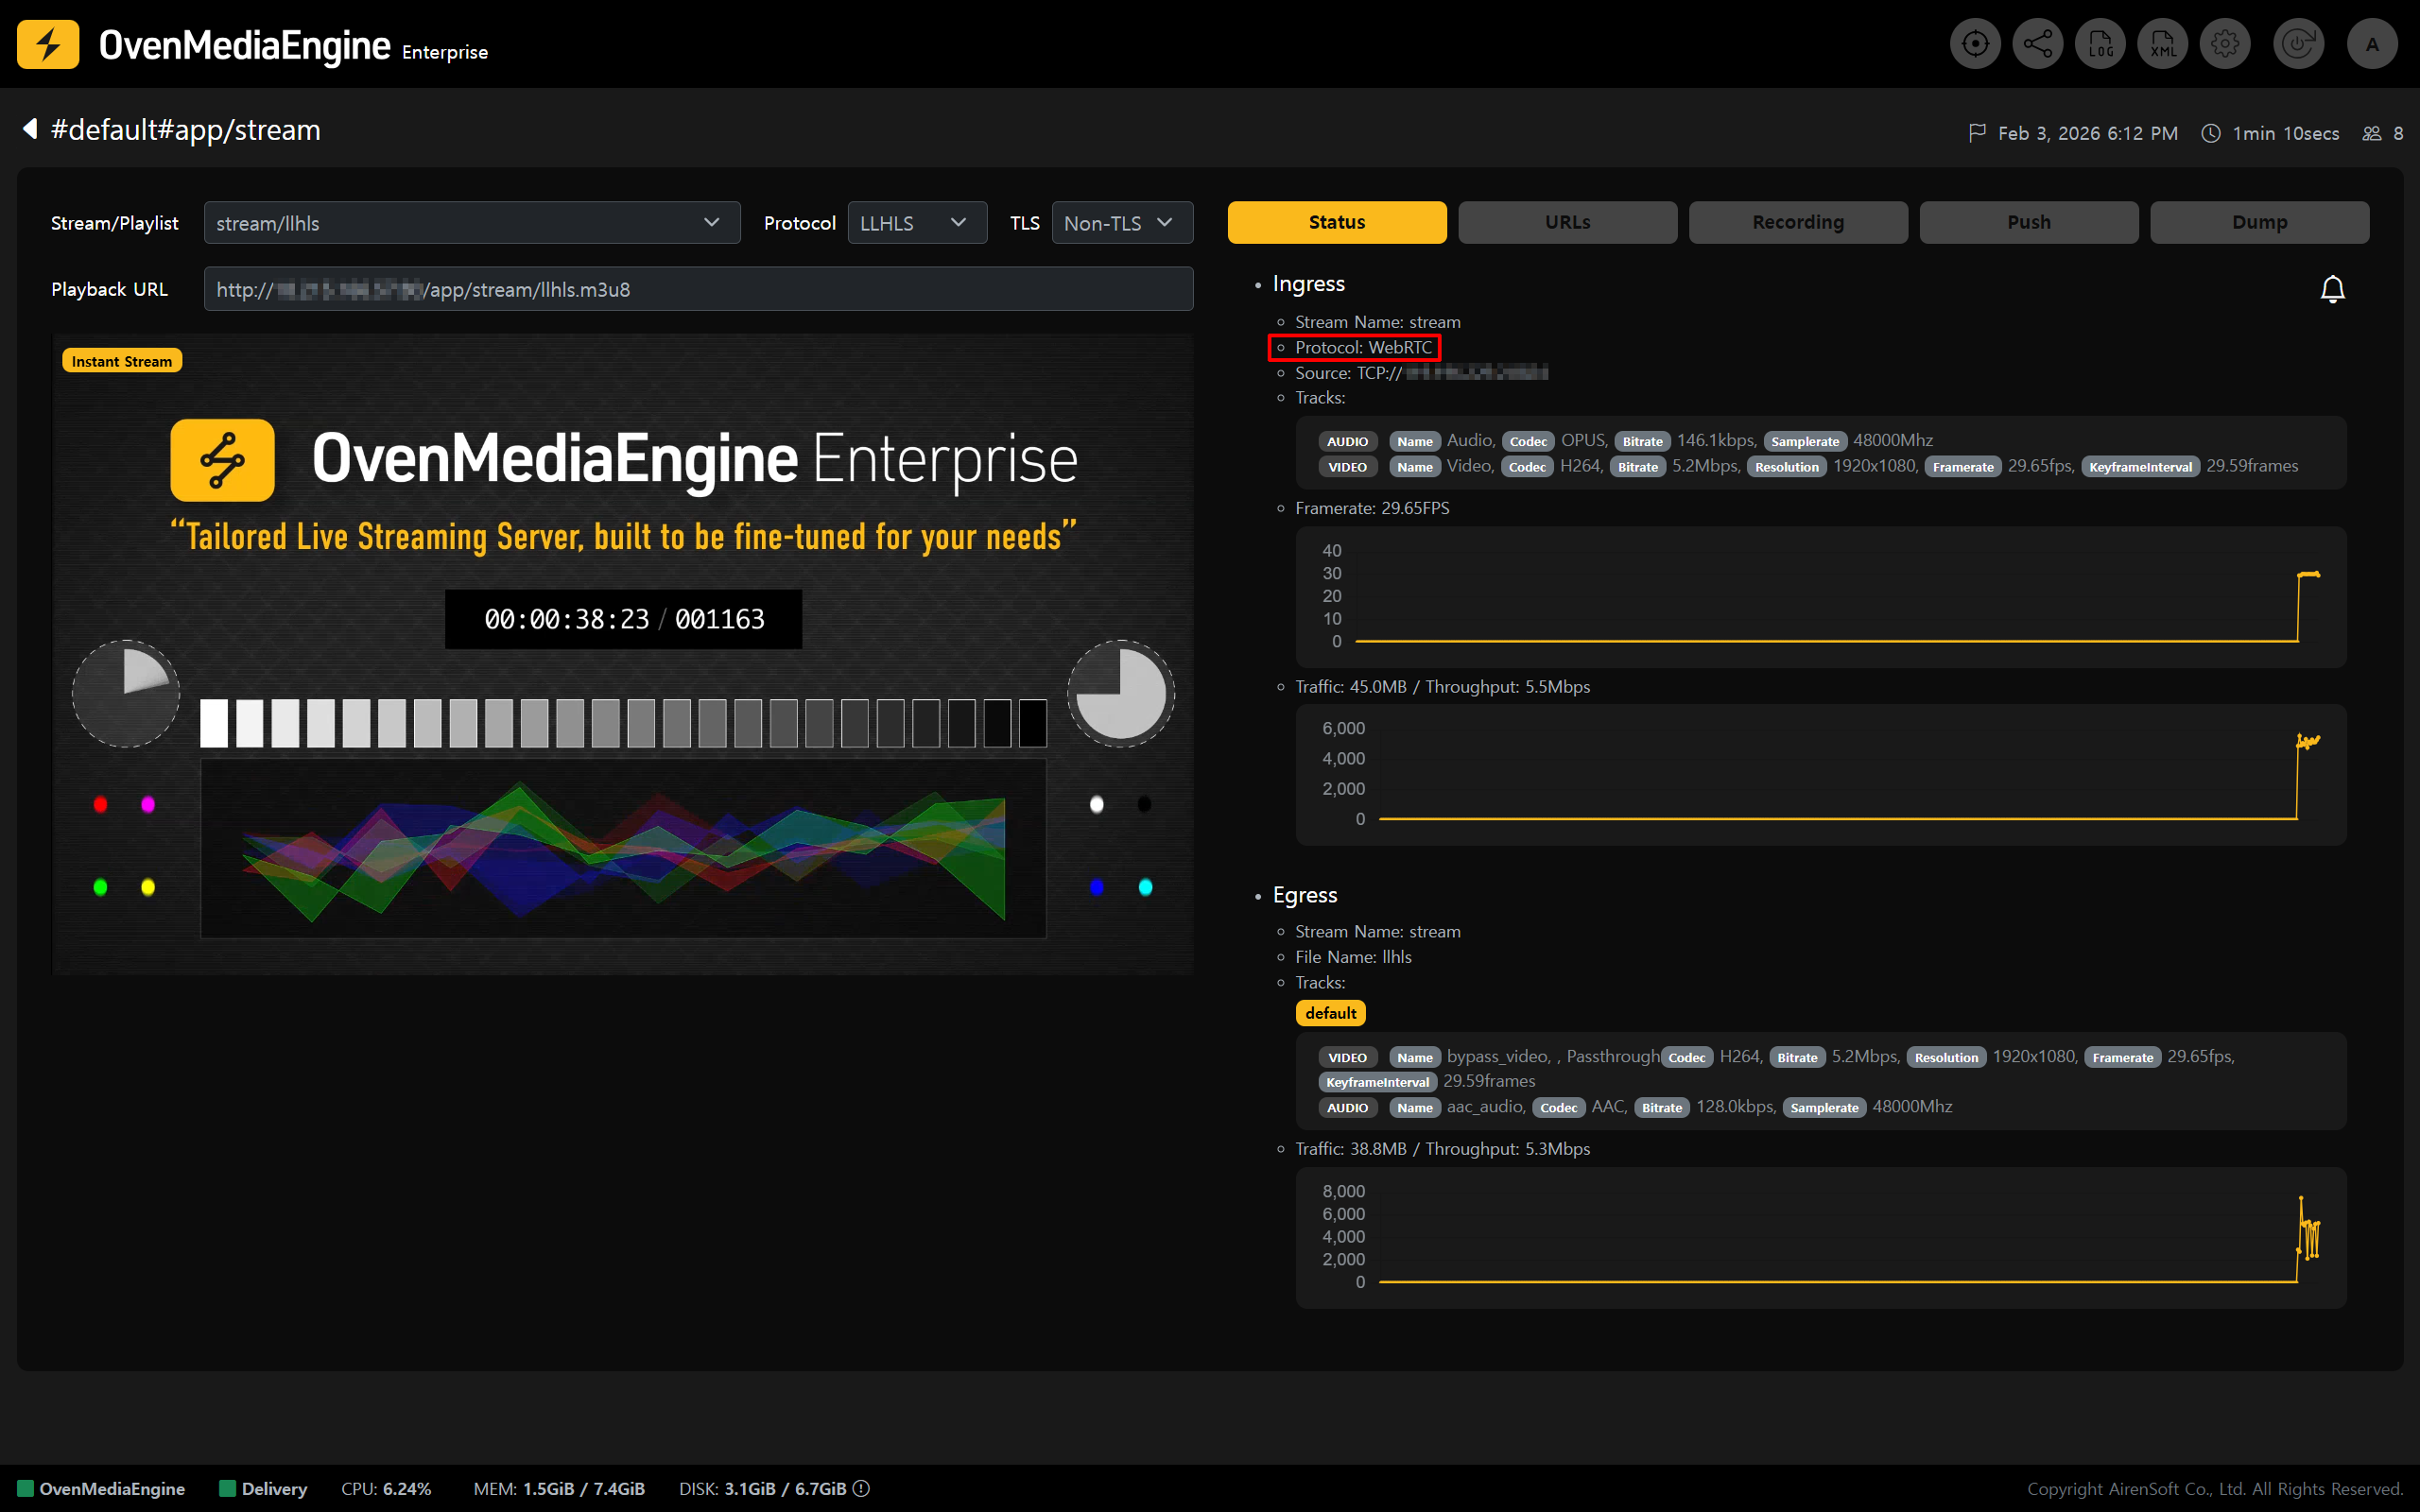
Check Stream Status and Playback in the Web Console
- In the Web Console, check whether the stream published from OBS or the OvenPlayer Demo appears in the list.