Publish via RTMP/E-RTMP
RTMP is one of the most widely used protocols for publishing streams from a live encoder to a service. It offers excellent compatibility with widely used encoders such as OBS Studio, making it suitable for getting started with streaming quickly. In addition, by using E-RTMP (Enhanced RTMP), you can configure streaming in a more controlled manner through extended options required for operational environments, such as authentication and security.
This guide walks you through the process of publishing a stream via RTMP/E-RTMP, followed by the basic steps for playback and status verification after publishing.
| Item | Supported |
|---|---|
| Container | FLV |
| Transport | TCP |
| Codec | H.264, AAC / H.265 (E-RTMP only) |
Start Publishing an RTMP/E-RTMP Stream
For this example, we used OBS Studio, one of the most commonly used live encoder software applications.
Publish with a Live Encoder (OBS Studio)
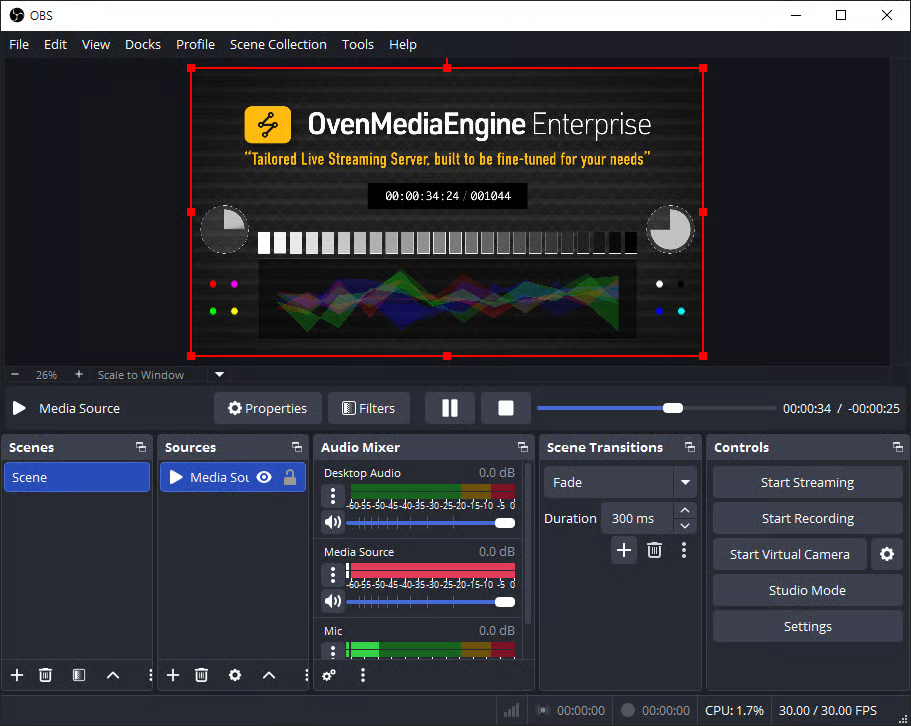
- Launch Open Broadcaster Software (OBS) Studio.
- If OBS Studio is not installed, download it from the official page (https://obsproject.com/download).
- Add a media source you want to publish (e.g., Media Source, Camera. or Screen Capture).
- Click [Settings] in the bottom-right corner of OBS.
Configure Streaming in OBS
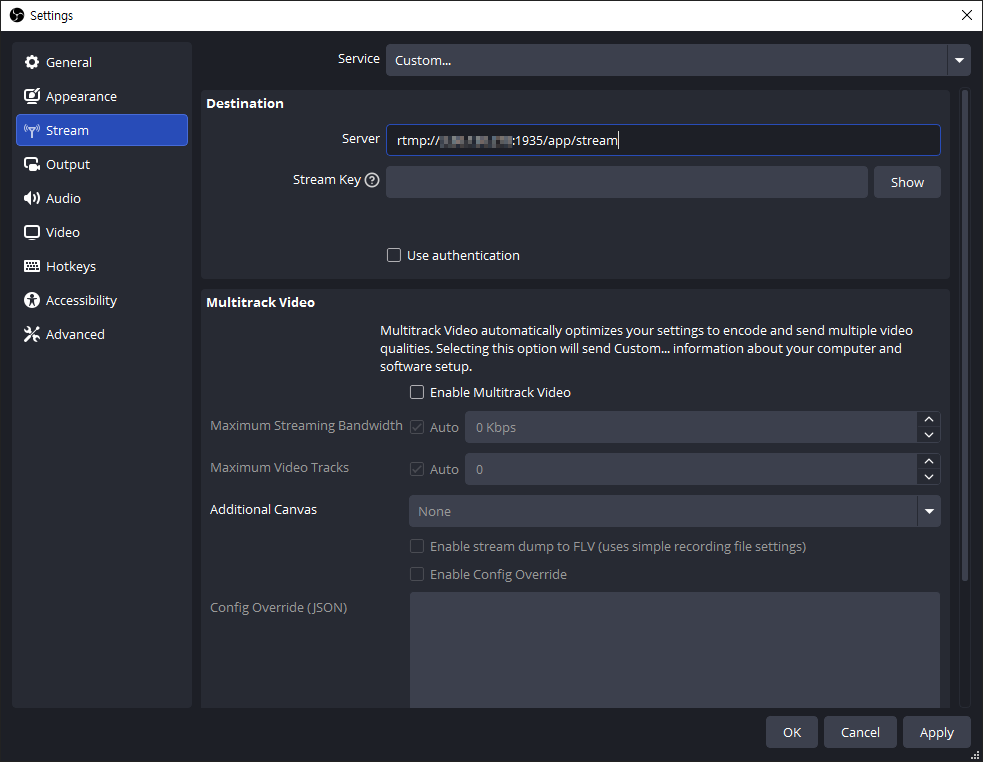
- On the left side of the Settings window, select the [Stream] tab.
- Under [Service], select [Custom], then enter the SRT Ingress URL in the Server field.
- Ingress URL Format:
rtmp://{Public IPv4 or Domain}:1935/{app}/{stream}
- Ingress URL Format:
If you are not sure about the RTMP or E-RTMP Input URL pattern, create a [Managed Stream] in the Web Console and check it under the [URLs] tab.
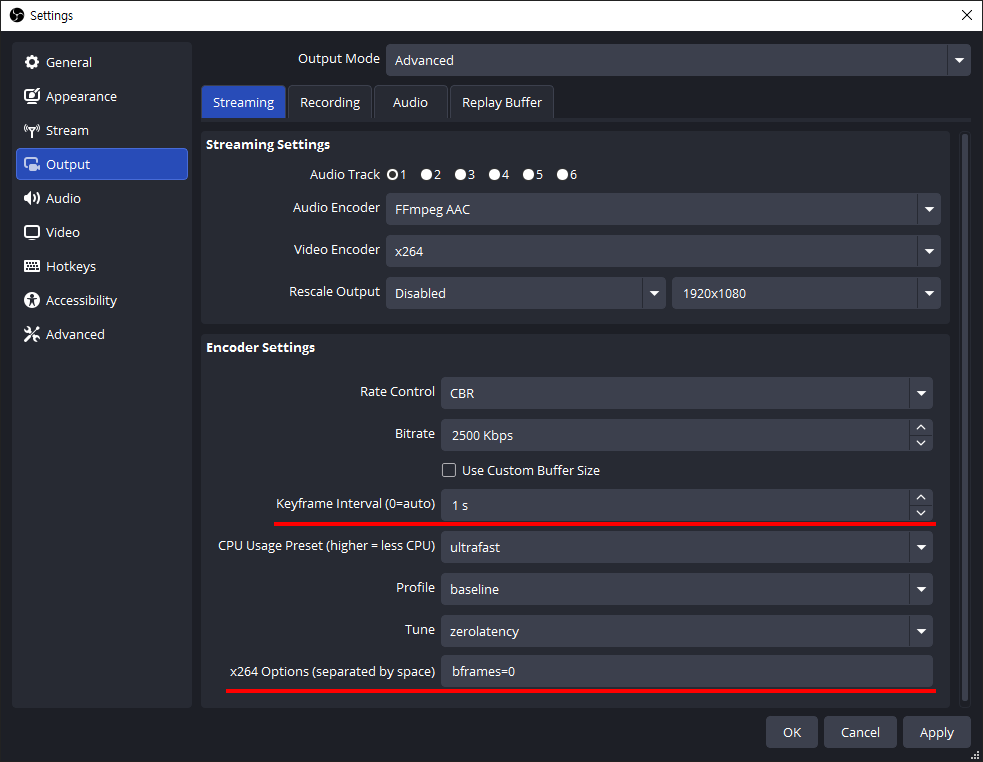
- Next, in the [Output] tab, we recommend setting the
Keyframe Intervalto 1-second andB-framesto 0 for smooth sub-second latency and low-latency streaming.- When using Enhanced RTMP (E-RTMP), set the video encoder to
H.265 (HEVC).
- When using Enhanced RTMP (E-RTMP), set the video encoder to
Setting B-frames to 0 (bframes=0) helps reduce playback stuttering in WebRTC output. The example above shows the configuration when using the x264 encoder. Depending on the selected encoder, available options and layout may vary. When using WebRTC as the output, setting B-frames to 0 is recommended.
- Adjust additional settings as needed in [Audio], [Video], and other tabs, then click [OK] to return to the main OBS window.
- When all settings are ready, click [Start Streaming] to begin publishing.
Check Stream Status and Playback in the Web Console
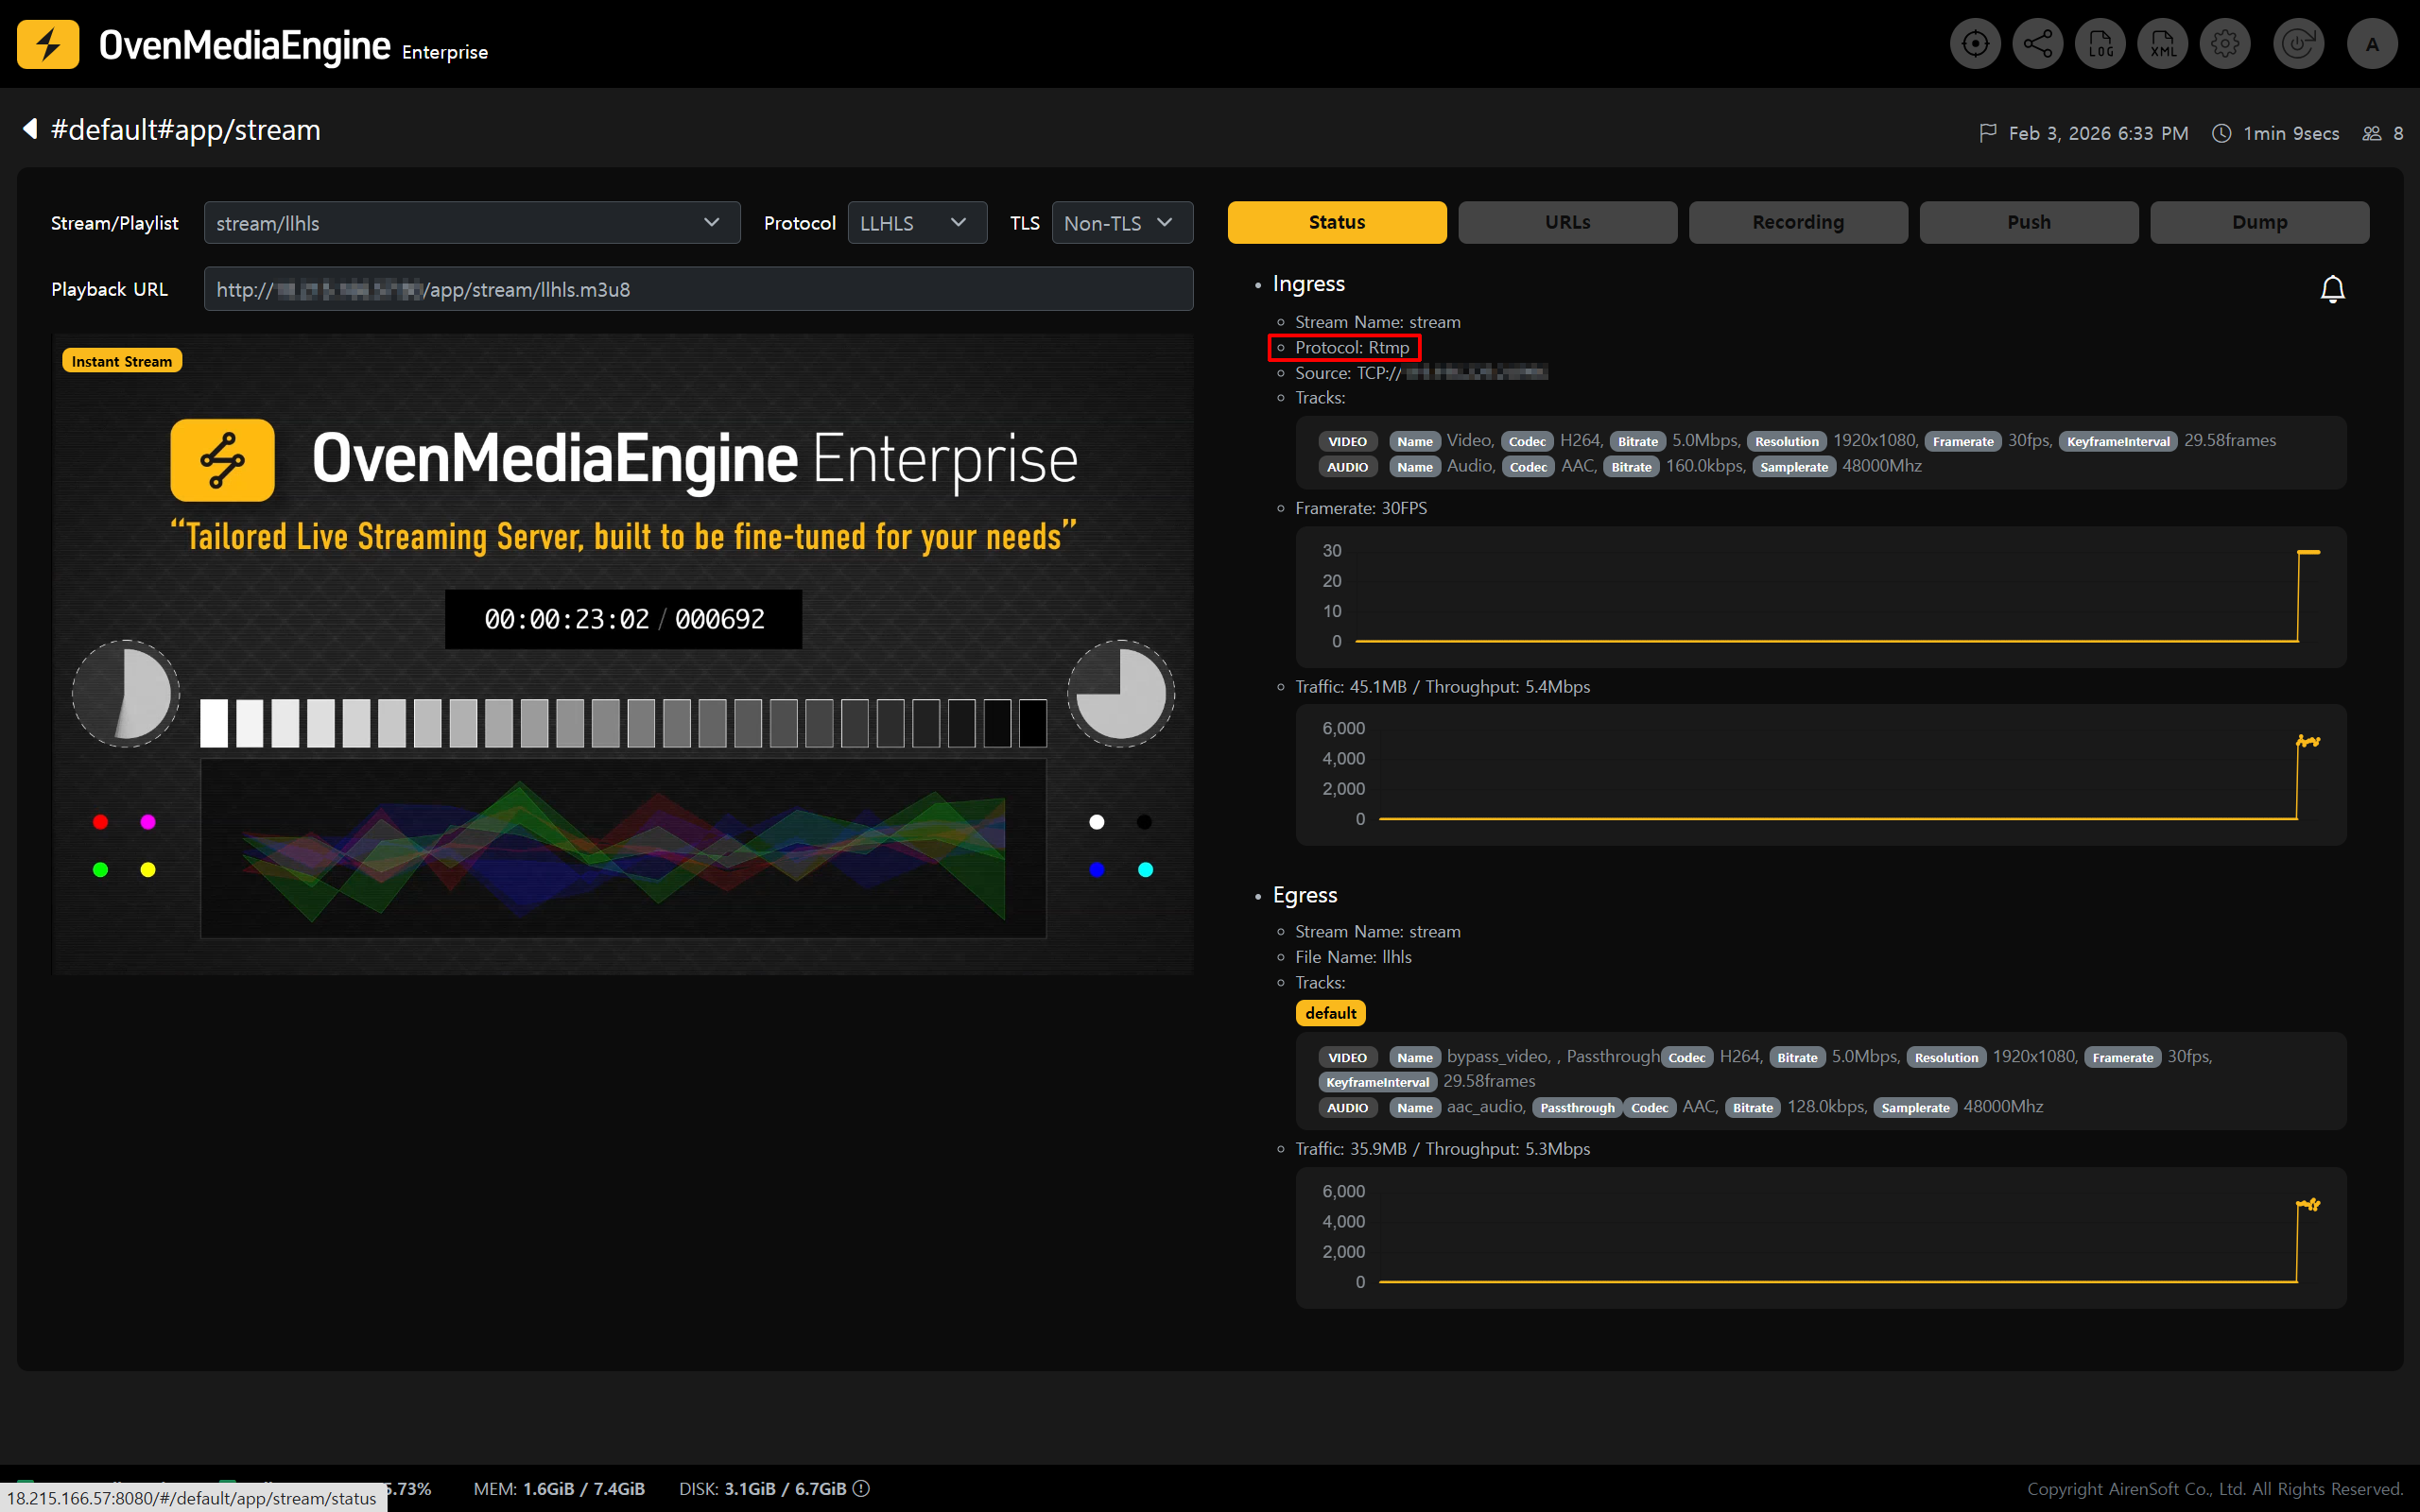
- In the Web Console, check whether the stream published from OBS or the OvenPlayer Demo appears in the list.